How to Improve Your Food Photography

“Don’t judge a book by it’s cover” said no one reading a food blog. Ever.
Let’s take a trip down memory lane shall we? Way back to the start of this little blog (4 years?!) ago.
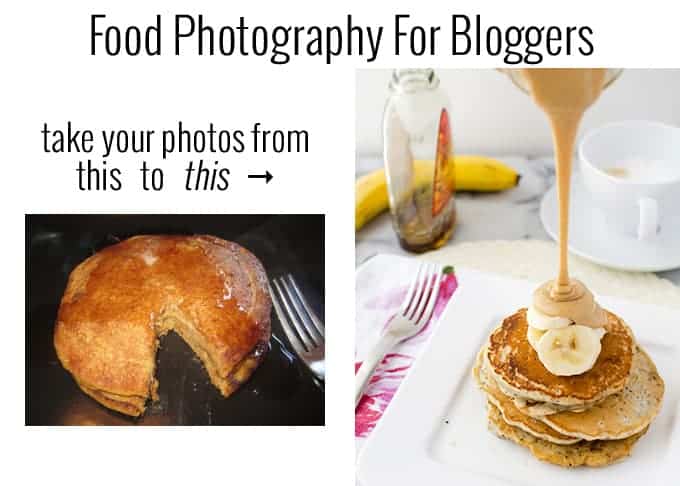
Back when photos looked like this —–>
Ah! What is even going on here? Besides the shadow of me taking the photo… with my phone no less. #shameful.
And this one. My personal favorite horrible-photo-that-should-have-never-been-posted-anywhere. I mean, would YOU make this soup? This puke-green blob of floating carrots and faux-chicken pieces? At least I remembered the garnish!
If pictures can tell a thousand words than this one is screaming “Don’t let the photos fool you, its delicious. I promise. Just close your eyes before eating”
As I reflect on another year gone by in this foodie-blogger world, I can’t help but look back on previous entries and laugh. Laugh hard because wow, there are a lot of WTF? moments. Um, a lot. Too many to count.
About a year or so ago, things got serious. Mainly in the photography section. I realized that if I wanted to have a blog that people wanted to read, my incredibly interesting, knowledgeable and witty posts wouldn’t be enough. Right? My blog has grown a lot over the past few months and I attribute that 100% to my food photography progress.
Since you can’t taste or smell the recipes, I have to show you. Photography is what grabs your attention; what makes you fall in love with the recipe, before you read a single ingredient. A task that is done best with mouth-watering food photography. And since I had never taken an art or photography class in my entire science-based life, my learning curve was steep.
So, like all good students- I got to work. I read, I practiced, I took courses. While there is always learning to be done, I am really happy with the current trajectory of my photos. It’s no surprise that this path took a village. Maybe you are the creative type who can pick up a DSLR, finagle a few buttons and poof! have photos that immediately get accepted into Food Gawker. If you are like me, the complete opposite, allow me to share with you the food photography resources that got me here.

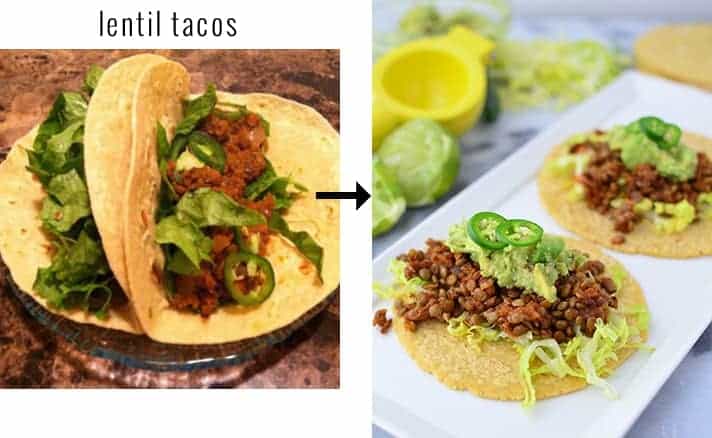
Same recipe, much different photo. Which one looks more appetizing? Yeah. That’s rhetorical.
First up, a camera. I’ve read plenty of books/blogs that say you can take great photos with your iphone or point and click but for me, I knew I had to get a DSLR. I found a great deal on this Nikon and it has been the best investment I’ve made thus far.
Even shooting on the auto setting was a night and day difference from my out of focus, dark in all the wrong places iphone photos. While I think that having the lens that comes with your camera works fine, I upgraded my lenses as Christmas presents to myself last year.
Recommended Camera Lens:
The first lens I upgraded to was the Nikon 50mm f/1.8D Lens ($117) I LOVE this lens and us it about 40% of the time when I am shooting food. For the price, can’t recommend it enough! This lens allows me to get closeup to my food and capture an incredible amount of detail.
A little more expensive is the lens I choose most of the time, the Nikon 35mm f/1.8G ($195). I can’t say enough great things about this one! While it’s similar to the 50mm lens above, this lens gives me a wider angle view. I use it mostly when I photograph in tighter spots, which is often since I live in a city condo. It’s also the BEST lens to use in overhead shots. For sharp photos, this lens cannot be beat. If you have to choose one, I would recommend the 35mm over the 50mm.
Recommended Food Photography Books:
After I got my camera and realized the tiny manual wasn’t going to cut it, I purchased a few books. As a visual learner, these were huge in helping me understand my DSLR and fancy terms like f-stop and ISO. It took a while for the concepts to really click, and I really believe in the old adage here- practice makes perfect.
Plate to Pixel by Helene Dujardin is my favorite book on food photography. This is a great first book for those who want to learn about food photo composition, lighting, and styling. Over the past year, I have collected quite a few books on food photography, but this is the one I keep referencing over and over again.
I highly recommend all bloggers purchase the Tasty Food Photography e-book by Lindsay of Pinch of Yum. If you’ve ever been to Pinch of Yum’s blog, you know this girl knows her food photography. This is the best e-book on making your food photography pop! What I love about this book, besides all of the great tips on photography and editing, are the videos! If you prefer to learn by video (I’m a youtube fanatic) than this is a great resource for you.
To learn more about food styling, I love this book- Food Styling: The Art of Preparing Food for the Camera. It’s the big daddy of food styling books. At over 400 pages it breaks down every type of food and how to style it best. While it’s geared towards professional photographers, I learned a lot on how to tell a story through your photographs.
Other Essentials:
A few months ago, I started the thing I never thought I would do- using a diffuser/reflector in my photos. WOW! What a difference it makes. I never thought I would do it because I didn’t think it would make a big difference… but it DOES. When I look back on older photos, I can always tell which ones I used a reflector on and which ones I didn’t. For softer, natural looking photos- use these props abundantly!
Diffusers/Reflectors:
If I’m shooting in the morning or midday, I use a white sheet to diffuse the light from our window. This helps soften the light and prevents ugly, light stealing shadows. If you don’t want to deal with thumb-taking a sheet to your window every few days, they sell really great diffusers online. This round one doubles as a reflector ($15).
Stock up on white foam board! I use these babies for just about everything. They are the best, inexpensive tool for directing light where you want it most. A handheld mirror also helps reflect light to the exact point that you want it to shine.
Artificial Light:
This is new territory for me. While I normally prefer to shoot in natural light (because it’s golden perfection), that’s not always possible with a full-time job and busy private practice. Sometimes I need to photograph at 10PM, long after there is any natural light around.
What I love about using an artificial light source is that it allows me to breath, relax, and take my time. Since I shoot most of my photos on the weekend, in between events and clients, I usually have a very small window of time to take quality photos. Using an artificial light source ($125) allows me to focus on what I need during the day- and shoot my photos when I have more time in the evenings.
Photo-Editing Software:
Lightroom is where the real magic happens. Sure, all of the tools I explained above provide me with a good photograph, but editing is where the real beauty starts. I use lightroom for all of my photos- if I want to add graphics, I’ll edit later in photoshop but I do usually do everything first in lightroom.
If you aren’t into graphics, I don’t think you need anything besides lightroom ($135. If you are a teacher or a student make sure to download the less expensive educator version!)
I hope this list on food photography for bloggers has been interesting! Since this is my first post on photography, let me know if you are interested in seeing more.
See you on Wednesday for another recipe featuring my favorite low-calorie Alfredo swap, creamy cauliflower sauce!
Some of the links on this page are affiliate links however I only link to products I own and wholeheartedly recommend. Thank you for your support.

